Tuesday, March 1, 2011

Greek Pasta Salad with Fresh Greens and Grilled Salmon


This salad has quickly become a favorite around our house. It is the perfect light yet satisfying meal and is full of fresh veggies and bright flavors from the red wine dressing. The whole wheat pasta noodles help to give some body to the salad to make it a bit more satisfying. It is pretty easy to put together too! I made this when we didn't have much left in the fridge. We loved it so much we are having it again tonight! The salmon is really easy to prepare and is absolutely wonderful. I am in LOVE with the Johnny Garlics seasoning I found at Costco. I use it on all types of meat, seafood, potatoes, veggies. etc. This salad was perfect with a side of hummus and toasted pita bread . There isn't really a strict recipe for this salad...it is pretty much just a bunch of ingredients thrown together. Please let me know if you have any questions! Enjoy!


Greek Pasta Salad with Fresh Greens and Grilled Salmon

For the salmon:

Salmon fillets, thawed if frozen (however many you want-I made one big one and split it)

Lemon or lime juice (fresh is the best)

Johnny Garlic seasoning (from Costco)

Fresh black pepper

Place salmon fillets on a baking sheet lined with foil. Squeeze fresh lemon or lime juice over fillets and season with Johnny Garlic seasoning and fresh black pepper. Place fillets under the broiler for 5 minutes or until cooked through but not dry.

Pasta Salad:

I didn't measure the amounts, so you will have to eye it.

Cooked whole wheat pasta noodles (I cooked 1/2 of a box of corkscrew pasta)

Chopped broccoli florets

Chopped carrots

Sliced kalamata olives

2 sliced scallions

Combine the above ingredients in a bowl, then add desired amount of the dressing and toss.

Dressing:

2 Tbsp. red wine vinegar

2 Tbsp. olive oil

2 tsp. Dijon mustard

salt and pepper to taste

1/4 tsp. thyme

Mix ingredients together.

Salad Greens:

Combination of field greens and romaine

Sliced hard boiled egg

White beans

Diced tomatoes

Diced cucumber

Diced avocado

Feta cheese

Assembly:

Place salad greens on the plate. Top with egg, avocado, beans, tomatoes, cucumber and feta. Place a scoop of the pasta salad on top of greens. Top everything with one cooked salmon fillet. If desired, drizzle a bit more salad dressing on top.


Sunday, February 6, 2011

Ham and Sausage Pizza


This just may be our new favorite pizza! Actually, I think I say that everytime I make a new pizza for us! This was thrown together with ingredients I just happened to have in the fridge and it was a great combination! I made my regular pizza crust recipe and topped it off with Classico brand tomato and basil pasta sauce, red onions, sliced red bell pepper, olives, sauteed mushrooms, diced smoked ham and chicken sausage. I used a combination of fresh mozzarella and provolone cheese to top it off. I love mozarella because it melts so well, is inexpensive and goes with anything. I love provolone because it has such a nice strong flavor! This was such a delicious pizza and we were left wanting more after it was gone. In fact, I am making more tonight because we loved it that much! It fits right in with my efforts to make the most of the ingredients I have on hand and cut down on our grocery expenses too....you've gotta love those kinds of meals!

Just as a side note, I always use a pizza stone when I make pizza. It makes the biggest difference! I have heard some people say that they don't like to use a stone because the crust sticks to it and makes a big mess. I have NEVER had my crust stick to the stone. The trick is to let it preheat in your oven at a high temperature for about 15-20 minutes. Pull it out right before you are going to put the crust on it. Sprinkle it with a light coating of cornmeal and then place your crust on top. You HAVE to let the stone get hot enough!!!! I always like to blind bake my crust for a few minutes (5-7) at 450 degrees, just so it starts to get a bit toasty. Pull it out and put the sauce and all other toppings on it. Once your pizza is topped, toss it back in the oven to finish baking and let the cheese melt. Blind baking the crust allows the dough to set up a bit so that the sauce doesn't get the crust all soggy. I hate soggy pizza crust.

Hope that little tip helps! Happy pizza making!!!

Tuesday, January 25, 2011

Lobster Ravioli with Roasted Shrimp and Vegetables


My husband and I were cruising through Costco one Friday evening and found the most delicious sounding lobster ravioli. I bought a package. It was our treat for that shopping trip. Besides, when do we eve buy anything that sounds as fancy as lobster ravioli? Before I actually put it in the cart, I looked at the ingredients just to make sure it wasn't full of a bunch of junk. Sure enough, the ingredients were pretty wholesome!!! Just a few simple ingredients which is what I was hoping for....lobster, cheese (four different kinds), and pasta dough. Of course there were a few other ingredients listed, but overall, it looked like a good product.

I contemplated for a few days just exactly how I wanted to prepare the ravioli. I decided that it would best be served simply, as to not cover up any of that YUMMY lobster flavor! I had a butternut squash and some asparagus on hand...PERFECT!!! I roasted the butternut squash with some olive oil, salt, pepper and garlic herb seasoning (also purchased at Costco). On a seperate pan, I roasted asparagus, mushrooms and a red belle pepper. Once all the veggies were roasted, I combined them together and tossed them with the cooked ravioli. I also roasted some shrimp to add a bit more protein and substance to the dish.

After it was all put together, I decided that some garbonzo beans and cranberries would top it off perfectly! I was right!!! Now that the main part of the meal was put together, I needed a sauce to add just a bit of flavor. I had a jar of Classico Sundried Tomato Pesto and some home made lemon parmesan dressing. I combined equaly parts of each and drizzled it over the pasta, shrimp and roasted veggies. IT WAS DIVINE!!!! The end product ended up a bit more complicated (but still very simple) than I had anticipated. But, we were extremely pleased!!! This is now one of my husbands most favorite meals. Especially when served with a big hunk of toasted crusty bread. Trust me, you can't go wrong!

Sorry for the lack of a real recipe for this meal, but I think it is near impossible to mess this dish up. How can you go wrong with roasted veggies, lobster ravioli and shrimp?!

Tuesday, January 11, 2011

Lemony Chicken Saltimbocca


Hello friends (is anyone really there or do I just imagine you are there?)!!! I can't believe a new year is here! I love the freshness and newness the beginning of a new year brings! I love the motivation I have to be a better person. I love setting goals for myself and love it even more when I have accomplished those goals! One of my goals this year is to post AT LEAST once a week. I have been terrible the past few months and hope to be better this coming year.


I saw this recipe on another food blog that I love called For the Love of Cooking. I have made several dishes or at least used several recipes from this blog as a base for something else. I have yet to be disappointed! This dish is absolutely delicious! My husband and I could not get enough of it! The flavor of the prosciutto is incredible with the tender chicken breast. It has a slightly smokey and salty flavor, but not over powering at all. The recipe originally called for 2 sage leaves per chicken breast, but my sage plant was covered with snow and not looking quite appetizing to use, so I simply left it out. I simply pounded the chicken breast, seasoned it with salt and pepper and then wrapped 1 large piece of prosciutto around each breast and seared it in a frying pan. I also roasted some asparagus and threw together a simple side dish of parmesan olive oil cous cous, and also tossed some acorn squash with olive oil, garlic and balsamic vinegar and roasted it. It was Heavenly. Seriously. I was impressed with how quickly this meal was to throw together too! If you have not tried prosciutto before, this is a good recipe to try. I am positive you will like it!


Lemony Chicken Saltimbocca

3 boneless and skinless chicken breasts, pounded thin

salt and pepper for seasoning

9 fresh sage leaves

6 slices of prosciutto

3 tsp. olive oil

1/2 cup chicken broth

1/4 cup fresh lemon juice

1/2 tsp. corn starch

fresh parsley chopped

fresh lemon wedges (for serving)


Pound chicken breasts to about 1/2 inch thickness. Season both sides with salt and pepper. Place 3 sage leaves on each breast and wrap with 2 slices of prosciutto. Heat 3 tsp. oil in a frying pan and heat over medium high heat. Once the pan is hot, add chicken and cook until golden brown; flip the chicken over and cook for an additional 3-4 minutes or until chicken is done. Let the meat sit aside on a platter to rest.

Combine the chicken broth, lemon juice and cornstarch together in a small bowl and whisk until well combine. Place the slkillet over medium high heat. Add the lemon juice mixture to the pan and bring to a boil. Cook for 1 minutes or until slightly thickened, stirring constantly. Drizzle the sauce over the chicken breast and serve.

Thursday, December 9, 2010

Cranberry Chutney

I apologize for not having a picture to share with you. Trust me, this stuff is definitely picture worthy. The problem is that both times I have made it, it has been completely consumed before I realized I hadn't taken a picture! Yes, it is THAT good!!! I was a bit skeptical when I was making this. I didn't know if the falvors were going to blend well together. They do. And very well might I add. This chutney is good not only with turkey, mashed potatoes and gravy, with a roll and peas on the side. This is delicious on a wrap, with tortilla chips, on bread and I am sure many other things. It would be delicious as a topping on some crackers with a light spreading of cream cheese. Truly the possibilities are endless. It is easy to throw together and takes almost no effort at all. Try it. It is SO much better than regular cranberry sauce!!!

Cranberry Chutney
1 12oz. bag fresh cranberries
1 apple, peeled, cored and diced
1 onion, diced
1 jalapeno pepper, finely minced
1 Tbsp. fresh garlic, grated or finely minced
1 Tbsp. fresh ginger, grated or finely minced
1/2 cup raisons
1/2 cup cider vinegar
1/2 cup granulated sugar
1/2 tsp. cinnamon
1/4 tsp. ground ginger
1/4 tsp. ground allspice
1/4 tsp. ground cloves

Place everything into a pot and bring to a boil. Turn heat down and let the mixture simmer until it is thickened-about 15 minutes.

Monday, November 15, 2010

Garlic, Lemon and Caper Pasta with Grilled Salmon

This dish has quickly become a favorite at our house. First because it is so delicious and second because it is quick (and extremely cheap)!!! I first made this recipe a year ago and just recently pulled it out again to make. I was craving salmon and some kind of light pasta. This was just what I needed! Plus, my husband absolutely loves this dish! It is light and healthy from the olive oil and lemon dressing, but it also packs a delicious punch of flavor from the fresh basil, lemon zest and tangy, salty capers. If you have never had capers before, you are in for a treat. Too many of them is overwhelming, but a sprinkling adds just the right amount of salty, tangy flavor. We like to top ours with paramesan cheese. This pasta is very versatile too! It pairs well with shrimp (which we had in addition to the salmon), grilled chicken or grilled steak. If you are looking for a avegetarian option, it is also quite tastey with some white beans tossed in. With a side of garlic or cheese bread and a green salad, your stomach will thank you!

Garlic, Lemon and Caper Pasta with Grilled Salmon

1 clove garlic, peeled and grated or minced finely
2 Tbsp. olive oil
Juice of 1 lemon
Zest of 1 lemon
3 Tbsp. capers (drained)
1/4 cup fresh basil torn or sliced
1/2 tsp. salt
1/2 tsp. fresh ground pepper
1/2 pound whole wheat spaghetti

Mix ingredients together and set aside. Cook pasta according to package directions and drain. In a large bowl, combine the dressing ingredients with the pasta and toss.

Salmon fillets (however many you need)
Lemon pepper
salt
pepper

Season the salmon with lemon pepper, a light sprinkle of salt and pepper. Place under broiler or grill until fish begins to flake. Serve salmon on top of a bed of pasta. Sprinkle with parmesan cheese. Serve.

Wednesday, October 20, 2010

Chili Rubbed Pork


I can't believe it has been so long since my last post! I have been so busy the past couple of months! I need to do a better job of posting.

This is a great recipe to get back in the swing of things. My husband and I were at Costco and saw these delicious looking pork sirloin tip roasts. Four of them came in a package for only $12.00! What a great price! This is the first of the three roasts that I made. It was every bit as delicious as I had hoped! I used a very simple spice rub to spread all over the roast. I served it with buttermilk mashed Yukon mashed potatotes and some peas. My husband and I both enjoyed this meal.....A LOT!!! The pork was some of the most tender meat I have ever had. The spice rub added a delicious and flavorful touch to the roast. Don't be scared by the addition of cinnamon in the rub. You can't actually taste the cinnamon itself-rather it enhances the rest of the flavors in the rub. This rub also makes delicious steak or chicken tacos too!

Chili Spice Rub
1 Tbsp. chili powder
1/4 tsp. cinnamon
1/4 tsp . salt
2 cloves garlic minced
pinch of cayenne (optional)

Combine ingredients and rub into meat or roast. Cook roast according to package directions.

Saturday, September 4, 2010

Beef Stroganoff


I am no expert when it comes to beef stroganoff. I haven't had this meal in years....at least 16 years or so. I guess that is because I haven't eaten red meat for almost that long. Recently, steak has been sounding so good. I decided to make this dish because it was really good when my mom made it all those years ago. This particular version included portobello mushrooms rather than the usual button mushrooms. Also, I remember my mom adding either katsup or tomato paste to the sour cream...I can't remember which, I just know that one of those tomato products was an ingredient and it added to the richness of the creamy sauce. This recipe also included thyme which added somewhat of an earthy flavor. My husband was a huge fan of this dish and ate it three nights in a row! I could only eat it one night, not because it wasn't good, but because I couldn't eat the red meat more than one night. But I enjoyed it very much the night I ate it! I served this dish with a green salad, roasted broccoli and a piece of garlic toast.
Beef Stroganoff
2 tsp. plus one Tbsp. canola oil
1 pound flank steak, trimmed
1 clove garlic, grated
4 large portobello mushrooms, sliced thinly
1 large onion, sliced
3/4 tsp. dried thyme
1/2 tsp. salt 1/2 tsp. fresh craked black pepper
3 Tbsp. all-purpose flour
1 14oz. can reduced sodium beef broth
1 Tbsp. red wine vinegar
1/2 cupsour cream
4 Tbsp. chopped fresh parsley or chives, chopped
Heat 2 tsp. oil in a large skillet over high heat until shimmering but not smoking. Add grated garlic and steak and cook until browned on both sides, 3 to 4 minutes per side. Transfer to a cutting board and let rest for 5 minutes. cut lengthwise into 2 long pieces then crosswise, across the grain, into 1/4 inch thick slices. Heat remaining 1 Tbsp. oil in the skillet over medium heat. Add mushrooms, onion, thyme, salt and pepper and cook, stirring often, until the vegetables are very tender and lightly browned, 8-12 minutes. Sprinkle the flour over the veggies and stir to coat. stir in broth and vinegar and bring to a boil, stirring often. Reduce heat to a simmer and continue cooking until the mixture is thickened, about three minutes. Stir in sour cream, chives or parsley, sliced steak and any juices that have accumulated. Bring to a simmer and cook stirring until heated through, 1 or 2 minutes more.

Wednesday, August 11, 2010

Ginger Lime Chicken


I know this is picture may be a little more on the "less than appetizing" side, but believe me, this is some of the most flavorful chicken I have ever had. It gets a special punch of flavor from lime juice, ginger, garlic and curry powder, and to me, you can't go wrong with that combination. I have had this recipe marked in my Every Day Food cookbook for a while now and finally got around to making it...too many recipes but too little time. Besides, there are only two of us in our home right now, and we can only eat so much! Anyway, you should give this recipe a try. It is a great change from your ordinary everyday chicken. I served this with a light couscous salad, grilled pita bread and a salad.
Ginger and Lime Grilled Chicken
1 Tbsp. Finely grated peeled ginger
1 clove garlic, minced or grated (not in the original recipe but I had to add it)
2 tsp. curry powder
4 scallions, minced (I didn't have any so I didn't use)
Coarse ground salt and pepper
8 bone in skin on chicken thighs (I used bonelees skinless chicken breast)
1 Tbsp. fresh lime juice
Heat broiler with rack set 4 inches from the heat. Line a rimmed baking sheet with foil and set aside. In a small bowl, combine all the ingredients besides chicken. Arrange the chicken on the bakaing sheet and season with salt and pepper. Pour the wet mixture over the chickne and rub it in. Make sure to rub under the skin if using chicken thighs. Broil for about 5-7 minutes or until chicken juices run clear and the meat is tender but no longer pink. Serve chicken with pan juices.

Tuesday, August 10, 2010

Mixed Berry Salad with Grilled Chicken


This salad has "summer time meal" written all over it. It is a delicious combination of fresh strawberries, plump blueberries, dry roasted almonds, and juicy grilled chicken on top of fresh mixed greens and dressed in a balsamic ranch dressing. It isn't much of a recipe, but it sure does taste good on a hot summer day! We had this salad with a delicious piece of grilled garlic bread on the side It made for a satisfying but light meal.

Tuesday, July 6, 2010

Herb Roasted Turkey= Turkey Sandwiches with Pesto and Avocado


This is the most amazing roasted turkey I have ever had! This will be the recipe I use any time I raost a turkey. It is amazing, moist, flavorful and so easy to put together. I bought a 6 pound turkey breast a couple of months ago when they were on sale. I figured that I would cook it up and use the meat for sandwiches, enchiladas, soup and salads. I now wish that I would have bought two or even three. Yes....this turkey is that good. The recipe comes from one of my favorite chefs, Ina Garten, from the food network. I don't have a roasting pan (I have been meaning to get one), so I just used a glass casserole pan to cook the turkey. Also, I used chicken broth instead of wine to put in the bottom of the pan. After the turkey was done roasting, I let it rest, pulled off the skin, and sliced it up. I stored the extra meat in ziploc bags to use later. My husband and I enjoyed some of the turkey in these delicious sandwiches. We toasted the bagle thins, and spread some cilantro pesto on each side. We topped it off with turkey, turkey bacon, sliced swiss cheese, avocado, tomato, pickles and some dijon mustard. I made some potato salad and cooked some corn on the cob for a delicious summer meal!
Herb Roasted Turkey Breast
1 whole bone in turkey breast, 6 1/2-7 pounds
1 Tbsp. minced garlic (3 cloves)
2 tsp. dry mustard
1 Tbsp. chopped fresh rosemary (I used dried)
1 Tbsp. fresh chopped sage leaves
1 tsp. fresh thyme leaves
2 tsp. kosher salt
1 tsp. freshly ground black pepper
2 Tbsp. olive oil
2 Tbsp. freshly squeezed lemon juice
1 cup dry white wine (I used chicken broth)
Preheat oven to 325 degrees. Place turkey breast, skin side up, on a rack in a roasting pan. In a small bowl, combine the garlic, mustard, herbs, salt pepper, olive oil and lemon juice to make a paste. Loosen the skin from the meat gently with your fingers and smearr half of the paste directly on the meat. Spread the remaining paste evenly on the skin. Pour the wine into the bottom of the roasting pan. Roast the turkey for 1 3/4 to 2 hours, until the skin is golden brown and an instant read thermometer registers 165 degrees when inserted into the thickest and meatiest areas of the breast. If the skin is over browning, cover the breast loosely with foil. When the turkey is done, cover with foil and allow it to rest at room temperature for 15 minutes. Slice and serve with pan juices spooned over the turkey.

Friday, June 11, 2010

Thai Chicken Pizza

I have been so bad about blogging lately. I have been extremely busy. I'm not using that as an excuse...it is the truth. Now that I will be assisting in planning a wedding, I will be extra busy! But planning a wedding is fun busy and I am so excited to plan it because it is for my beautiful, wonderful, sweet, kind and dear sister! I could not be any happier for her!

I know I have posted a Thai chicken pizza recipe before, but this one is different and, to be honest, much better! It is PACKED with flavor!

This recipe uses a peanut sauce that is full of deliciousness from ginger, garlic, soy sauce and of course peanut butter. This sauce would also be wonderful tossed with some noodles and stir fried veggies.

Please try this. You will love it!

Thai Chicken Pizza
1 store bought or homemade pizza dough recipe

Sauce:
1/2 cup peanut butter
2 Tbsp. sesame oil
1/3 cup soy sauce
2 Tbsp. rice vinegar
1 Tbsp. water
1 Tbsp. packed brown sugar
3 cloves garlic
1-1 1/2 tsp. fresh ginger, minced or grated

Blend in a blender until smooth

Other toppings:
diced chicken (Iused a rotisserie chicken from Costco)
1 carrot cut into match sticks or grated
1 red bell pepper, cut into strips
sliced black olives
sliced sweet onion
1-2 scallions, sliced
1/4 cup cilantro, chopped
2 Tbsp. chopped peanuts
fresh mozzarella cheese, grated (I also used a bit of smoked gouda!)


Preheat the oven to 450 degrees. Roll out the pizza dough on a floured surface and place on a preheated pizza stone (spread some cornmeal on it first) or on a cookie sheet (sprayed with non-stick spray). Bake the crust for about 5-6 minutes. Spread some of the sauce on the crust, followed by the cheese, chicken, onions and the rest of the ingredients besides the bean sprouts. Bake for an additional 10-11 minutes or until the crust is a light golden color and remove from oven. Top with fresh bean sprouts. Enjoy!

Tuesday, May 25, 2010

Sweet and Sour Meatballs


I saw this recipe on another food blog and had to give it a try. I had never made meatballs as a meal before and wanted to give it a try. This recipe had great reviews so I figured I couldn't go wrong. I made a few minor changes to the recipe beginning with the meat. I used lean ground turkey instead of beef and I would highly recommend it! The turkey went really well with the rest of the ingredients and it was a lot more healthy. Besides, I didn't have to worry about a bunch of fat and grease pooling in the sauce as they baked. That would just be wrong and I am pretty sure I would not have been able to eat them. I also added a grated clove of garlic, just because it sounded good. A key ingredient in the sauce is BBQ sauce and in my opinion, anything with BBQ sauce in it or on it is delicious. It is a bit more tangy with the vineager and is delicious with the rice. I served the meatballs over brown scallion and edamme rice with a green salad and a piece of cheese toast. It was a yummy meal and I will be making these again!

Sweet and Sour Meatballs
1 1/2 pounds lean ground beef (I used ground turkey)
3/4 cup quick oats (I used regualr and it was fine)
2 eggs, slightly beaten (I used one)
1/2 cup finely chopped onion
1/2 cup milk
1 tsp. salt
1/2 tsp. ground black pepper
1 tsp. Worcestershire sauce

Combine all of the ingredients and mix well. Form into 12-14 balls each about 2 inches in diameter. Place in a casserole dish and cover with sauce below. Bake at 350 degrees for 25 minutes or until the meatballs are cooked through.

Sauce:
1/2 cup brown sugar
1/4 cup apple cider vinegar
1 tsp. yellow or Dijon mustard
1/4 cup BBQ sauce
1 tsp. Worcestershire sace

Combine ingredients in a small sauce pan and heat until well combines and sugar is dissolved. Pour over the meatballs. (I doubled the sauce and it was the perfect amount for 1 recipe of meat balls).

Wednesday, May 19, 2010

Italian Sausage Manicotti


Once again, I apologize for the horrible picture. This is a wonderful and easy meal to put together. I like to make a couple of pans and freeze one for a meal for later. I found the recipe on another food blog. It sounded so delicious that I knew I had to make it! When my mom made manicotti or lasagne, she always included shredded carrots and zucchini, so I knew right away that I would be adding each of those. I am so glad that I did! It helps to add some bulk to the filling and it is another way to get in some more veggies! I only used two chicken sausage links because that is what I had. I know it might sound like a complicated dish, but it actually came together rather quickly. I served this with a nice green salad and some toasted sourdough bread. Yummy!


Italian Sausage Manicotti

1 onion, diced

2-4 links chicken or turkey Italian sausage

8 oz.pkg. sliced mushrooms
4-5 cloves garlic, minced
1/2 tsp. dried oregano
salt and freshly ground black pepper
15 oz ricotta cheese (I used part skim and it was great!)
dash of nutmeg
2-3 Tbsp. fresh parsley, chopped
5-6 fresh basil leaves, chiffonade
4-5 Tbsp. parmesan cheese
Manicotti shells, cooked (I used 1 whole box, 16 shells, and made two 8X8 pans)
3 cups marinara sauce (I used Classico brand)
1 1/2 cups mozzarella cheese, divided (I used a lot less because we didn't have much. It still turned out yummy!)
1-2 zucchini grated*optional
1-2 carrots grated *optional


Preheat oven to 350 degrees. Put a little bit of the marinara sauce in the bottom of your pan (or pans). Heat a skillet and add a touch of olive oil or spray with non-stick spray. Add the sausage (remove from casing) and cook for 1-2 minutes while crumbling. Remove the sausage and pour out any fat. Add mushrooms and onions to skillet and cook for 3-4 minutes. Add sausage back to pan and add minced garlic. Cook for a minute longer, making sure the sausage is cooked through. Remove from heat and set aside.

Cook the Manicotti shells according to the package directions and set aside to cool. In a large bowl, add the cooled meat mixture, ricotta cheese, grated nutmeg, parsley, basil, 1/4 cup mozzarella, 2 Tbsp. parmesan cheese (I also added a bit of cottage cheese to make more filling), shredded carrots, shredded zucchini, and salt and pepper to taste. Stir the mixture to combine. Fill the manicotti shells and lay filled shells in the pan(s). Cover with remaining sauce, mozzarella and parmesan cheese. Cover with foil and bake in oven for 30 minutes. Remove foil and cook for an additional 5 minutes. Serve with crusty bread and salad!

*if you want to freeze a pan, assemble the manicotti and cover with foil. Do not bake it before freezing. The night before you want to eat it, take it out of the freezer and thaw in the fridge. Bake for 35-40 minutes.

Monday, May 17, 2010

Sweet and Savory Couscous Salad

This is a delicious salad to have during the summer time when you don't feel like heating up your kitchen. It is made with couscous, a quick cooking pasta, and lots of fresh veggies and herbs. The couscous only takes about 10 minutes from start to finish. I used sliced scallions, carrots, apricots, parsley, cilantro, basil and garbonzo beans to help bulk up the couscous. You can use pretty much any veggies you wanted to or whatever needed to be used up in your refrigerator. The dressing is light and sweet, yet savory at the same time. I know that cinnamon seems like a strange spice to use in a dressing, but trust me, it works and very well might I add!

Sweet and Savory Couscous Salad
1 large carrot, peeled and diced
4 scallions, sliced
1/2 red or yellow bell pepper, diced
2 Tbsp. minced fresh parsely
2 Tbsp. minced fresh cilantro
Fresh basil, sliced into ribbons
1 15 oz. can garbonzo beans, drained and rinsed
6 dried apricots chopped
2 cups chicken broth
1 1/4 cups couscous
Dressing
1/4 fresh orange juice
1/4 cup fresh lemon juice
1/4-1/3 cup olive oil
1/2 tsp. salt
1/4 tsp. ground cinnamon
1/8 tsp. cayenne pepper (optional)
Combine dressing ingredients in a small bowl and mix well to combine. Set aside. In a medium sauce pan, bring chicken broth to a boil and add couscous. Cover and remove from heat. Let stand for 5-10 minutes or until liquid is absorbed. While couscous stands, combine all the veggies, herbs, beans and dried fruit. When the liquid is absorbed, add the couscous to the veggies and stir. Slowly pour some-not all- of the dressing over the salad and todd to combine. I served this with mango and ginger grilled fish, steamed chard, and a green salad.

Sunday, May 9, 2010

Jalapeno Poppers


My husband could not get enough of these! They were so easy and a lot more healthy than the regular deep fried jalapeno poppers. I used turkey bacon and scallions to flavor the filling. I bought a total of 10 jalapenos to make this recipe but only made a few since I knew he would be the only one eating them (I don't do so well with dairy and these have cream cheese). But I can tell you that they smelled WONDERFUL! My husband ate the entire plate almost the second I pulled them out of the oven.
Jalapeno Poppers
10 jalapenos, stems removed, sliced in half and seeded
1 8oz. pkg. cream cheese, at room temp. (I used low fat)
3 scallions, sliced
4 pieces bacon, cooked and chopped (I used turkey bacon)
1/2 cup panko bread crumbs
Combine cream cheese, scallions and chopped bacon. Stir to combine well. Scoop desired amount of filling in the jalapeno halves. Dip each half in the panko and spray the tops lightly with cooking spray. Bake at 375 for about 20 minutes or until peppers are cooked through and the tops are golden brown.


Thursday, April 29, 2010

Broiled Polenta with Black Bean, Mango and Corn Salad


This is a meal that I threw together because I was really in the mood for polenta. I had only had it twice, once served broiled and once served soft. Although both ways are delicious, I think that I prefer the crispy crust the poleta gets when it is broiled for a few minutes. If you have never tried polenta before, you are really missing out. It is simply delicious! Honestly, I think that we will be having it a lot more often. It is inexpensive, and a great alternative to rice, pasta, or potatoes. I don't know about you, but I HAVE to have some kind of good starch with each meal. I love bread, potatoes, pasta, quinoa, couscous, and of course rice. Polenta is a welcomed change and will be making a lot more appearances on our table. Especially after this meal. My husband could not say enough about this meal! It was filling but light and packed full of flavor! I could honestly eat this for a week straight and still want more! This meal is composed of a few of my favorite things. Lime, cilantro, corn, black beans, fresh mozzerella, fresh veggies, mango, garlic, scallops (with my meal and steak wtih my husbands), and polenta! It may look like it takes a long time to make, but it really doesn't and it is very easy! You need to give this recipe a try...you won't be sorry!


Broiled Polenta

3/4 cup polenta (not quick cooking)
1 tsp. salt
1/4 tsp. fresh ground pepper
1-2 tsp. butter (I use Smart Balance Light)
1/4 cup parmesan cheese, grated

Bring 4 cups of water, salt and pepper to a boil. Add polenta in a slow stream and stir constantly. Continue to stir until thickened. Reduce heat to medium low and continue to cook, stirring frequently until polenta is smooth; about 10 minutes. When fully cooked, add butter and cheese and stir to mix. Lightly spray a small-medium bread loaf pan with non-stick spray and pour polenta into it. Let the polenta sit and cool before covering and placing in the refrigerator to set. I prefer to let it sit overnight, but it needs at least a couple of hours. When polenta is set, cut into 1/2 inch thick sliced and place them on a lightly oiled cookie sheet. Place slices under broiled for about 20-25 minutes, or until desired golden crust is acquired. Once polenta is broiled, you can put a slice of cheese (we used fresh mozzerella) and place under the broiler until melted.

Black Bean, Mango and Corn Salad
1 clove garlic, minced or grated
1/3 cup fresh lime juice
1/4 cup olive oil
1 tsp. salt
fresh ground black pepper
handful of fresh cilantro, chopped
1 15 oz. can black beans, drained and rinsed
1 red bell pepper, diced
2 tomatoes, diced
1/4-1/2 fresh mango, diced
5 scallions, sliced
1 1/2 cups frozen corn, thawed
1/2 jalapeno, minced (optional)

In a medium mixing bowl, combine all dressing ingredients and mix well. Add the remaining ingredients and toss to coat. Refrigerate for at least 1 hour before serving.

*Note: This salad is also wonderful with diced avocado added just before serving.

I served this meal with a large fresh green salad, grilled shrimp and seared scallops (for me) and grilled steak for my husband. YUMMY!


Tuesday, April 20, 2010

Coconut Green Curry Chicken


I have been craving curry for a while now and am just now getting around to making some. I have never used curry paste before and thought I would give it a try. I could only imagine that in combination with coconut milk, this dish would for sure satisfy my curry craving. I found this recipe in the new cook book by Everyday Food. I did alter it just a bit by adding more veggies. I love my veggies and as is, I am sure the recipe with green beans alone would be enough veg for most people. I, however, like lots of veggies! I added 2 large carrots sliced on this diagonal and some frozen peas. Also, if you think you can go without the fresh basil on top of this dish...bad idea. It really needs the flavor of the fresh basil. I also sprinkled a bit of soy sauce on top after it was all dished up. I think that was necessary as well. I finished the dish with some salt and pepper.

I served this dish with toasted pita chips and hummus. It was a big hit and I will for sure be making this one again.

Coconut Green Chicken Curry
1 cup long grain white rice
1 Tbsp. cornstarch
1 Can (14.5 oz.) of chicken broth
2 Tbsp. vegetable oil
12 ounces (about 3 1/2 cups) green beans, stems removed, halved crosswise
1 medium onion, halved and sliced
1-2 Tbsp. Thai green curry paste
4 roasted chicken breasts, skin and bones removed, meat cut into 1 inch pieces
1 (14.5 oz.) can coconut milk
1 cup torn fresh basil
2 Tbsp. fresh lime juice (from 1 lime)

Cook rice according to package instructions. Meanwhile, place cornstarch in a medium bowl, whisk in2-3 Tbsp. chicken broth until smooth (reserve remaining broth). Set aside.
Heat oil in a large skillet over medium heat. Add green beans (and any other veggies). Cook stirring often until veggies are slightly tender.
Add curry paste to the veggies. Cook, stirring and scraping bottom of skillet until paste is slightly darkened, 3-4 minutes. Add chicken, coconut mil, reserved broth and cornstarch mixture. Simmer until vegetables are tender and sauce is slightly thickened, 5-8 minutes. Serve over rice and top with basil and a squirt of lime juice. Season with salt and pepper.


Friday, April 16, 2010

Potato Rosemary Pizza


I apologize for the horrible picture. It does not do this pizza justice. After finishing the last slice, my husband said how sad he was that it was all gone. Sad to say, this giant sized pizza only lasted two days at our house. Did I mention there are only two of us? Yes, we managed to polish off an entire extra large pizza in just two nights. I am pretty sure that the slices of pizza we each ate were double the size of our heads. Oh well, I think that is a good sign that we liked it! At first, my husband was a bit hesitant to try it. I mean, potatoes on pizza?! Try it. You'll love it just like us. The flavors melted so wonderfully together. Between the garlic roasted potato slices, fontina cheese, rosemary, chicken sausage and caramalized onions, we were honestly both in heaven. I did not follow a specific recipe for this pizza. Almost every potato rosemary pizza recipe I looked at called for bacon and we are not really bacon eaters here. I took the ingredients that were common in each of the recipes (fontina cheese, potatoes, and rosemary) and added a few of my own ingredients. I added chicken sausage, shredded chicken, caramalized onions, olives and sliced bell peppers (only on my half). It was DIVINE! I have to admit, I make one mean pizza crust too! I think that between rolling the dough out thin and cooking the pizza on a pizza stone, I have never had a better pizza crust. And that's the truth. Also, I like to cook the crust for a few minutes before putting the toppings on. That really helps keep the crust from getting soggy.
Potato Rosemary Pizza
2 medium yukon gold potatoes, sliced thin
2 cloves garlic, minced or grated
olive oil
cooked chicken sausage
1-2 Tbsp. minced rosemary
1 large onion, sliced thin
1/2 red bell pepper, sliced
shredded chicken
grated fontina cheese
2 Tbsp. ranch dressing
sliced black or kalamata olives
1 recipe of pizza crust or 1 pre made pizza crust
Pre heat the oven to 425 degrees. Spray a cookie sheet with non stick spray and lay the potato sliced down. Sprinkle the minced garlic over the top, drizzle a bit of olive oil on top and sprinkle with salt and pepper. Place in the oven for about 15-20 minutes until the potatoes are tender but not browned. In a medium skillet, heat a small amount of olive oil and add onion slices. Cook over med-high heat until slightly caramalized. Turn off the heat and set aside. When you are ready to top the pizza, spread 2 Tbsp. ranch dressing, sprinkle with cheese, and layer the potatoes on top. Sprinkle the rosemary on top of the potatoes, add the sausage, sliced olives, bell pepper, onions and shredded chicken. Sprinkle with more cheese and bake until it looks done. I usually cook pizza on 450 degrees for 15 minutes. Enjoy!!!!

Wednesday, April 14, 2010

Turkey Tacos


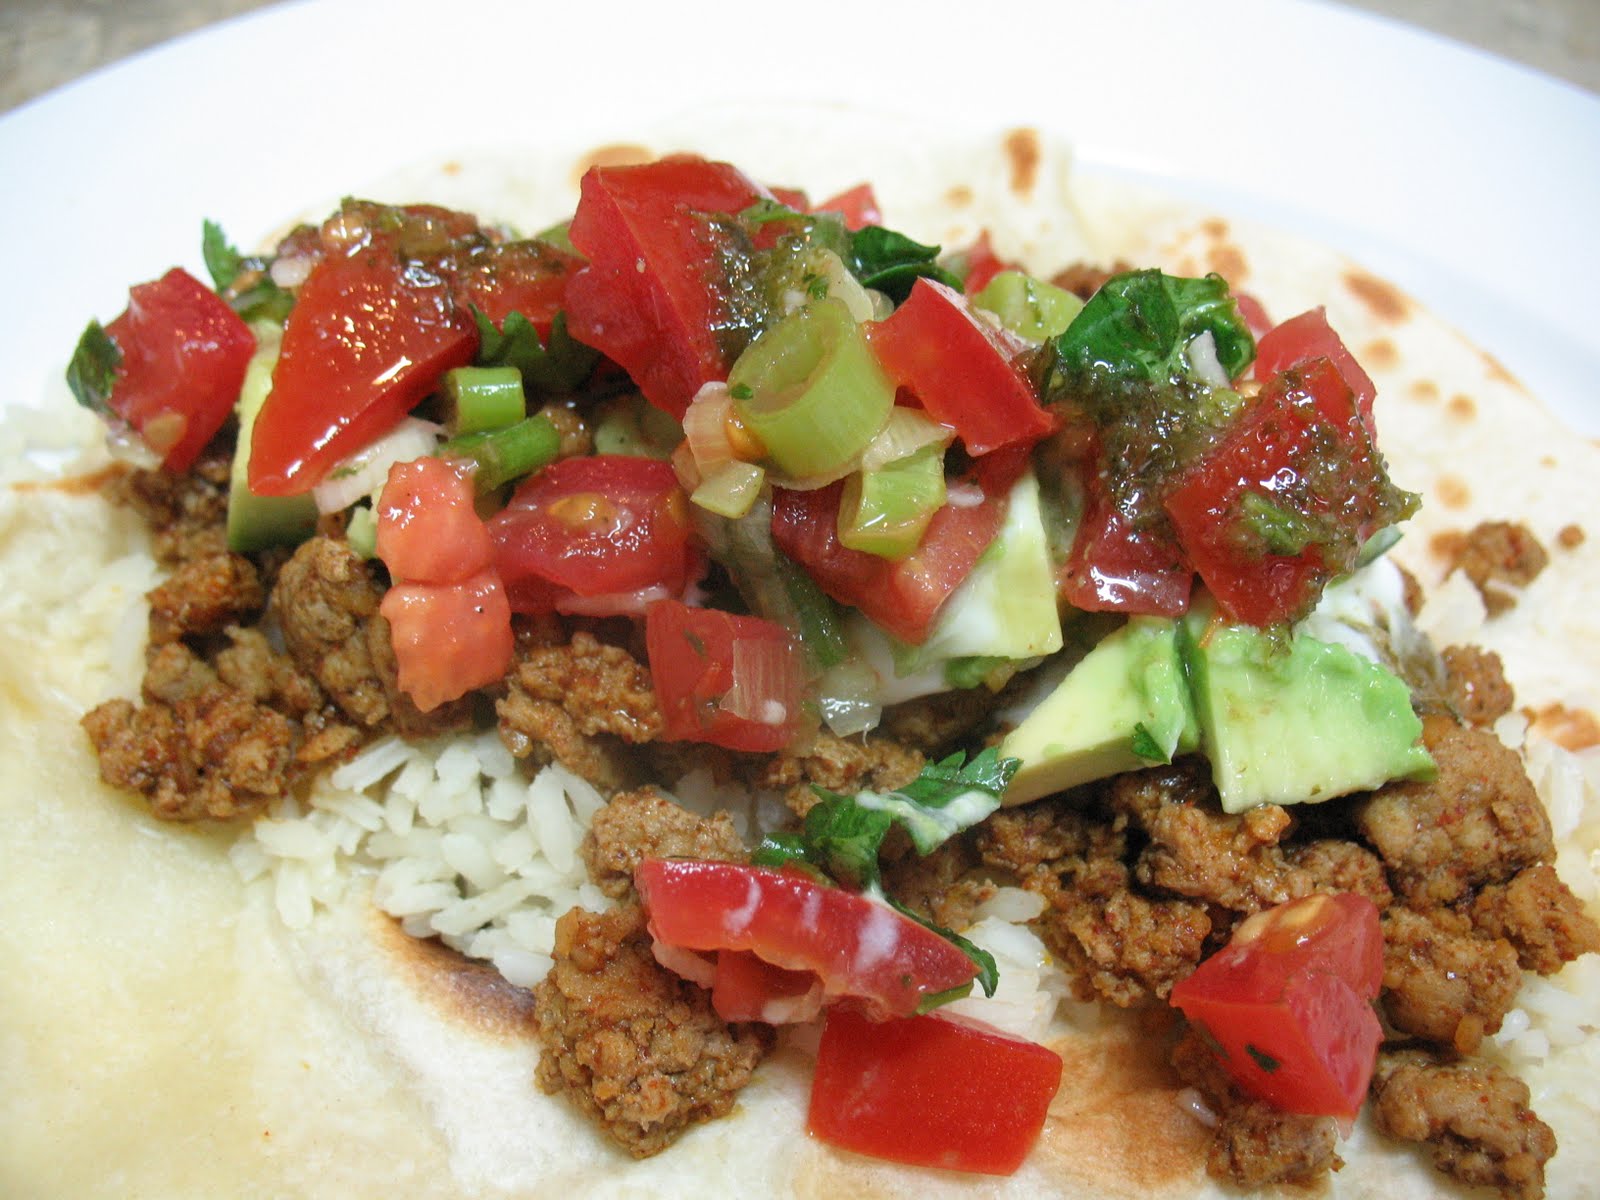
We are officially big fans of ground turkey. There are so many different things you can do with it and it is a nice change from chicken. Ground turkey makes great burgers, sloppy joes and tacos! There isn't anything super special about these tacos. Other than the fact that they are made with homemade pico, guacomole a fresh rice, these tacos are basically like regular ground beef tacos. That's right! These tacos were made with a packet of taco seasoning. We were in need of a quick, simple meal. Mexican food always seems to hit the spot. I made the pico by dicing up 4 roma tomatoes, slicing 3 scallions, juicing 1/2 lime, chopping up some cilantro and adding a slight sprinkling of salt and tossing everything together. I like to let it sit overnight to let the flavors soak through. Once the pico and guacamole are made, we layer the tacos in this order: Cheese, taco meat, non-fat plain yogurt, guacamole, pico and olives. Wrap it all up in a tortilla and enjoy!! These make for a great week night meal!